 >> swifty's hq v2.2 > main > blog
Memory In Moss: From Start To Finish
thumbnailing

i will admit i started the thumbnail sometime after i started the sculpt, but it did help me get a better idea of what i wanted the finished product to look like. i sketched the dogthing shape and noted changes to make, and the overgrown look to be added later.
sculpting
to start, i blocked out the limbs, body pose, tail, and head. i put it on a square block that ended up being incorporated into the final piece, though it was meant to be less prominent or altogether removed at this point.
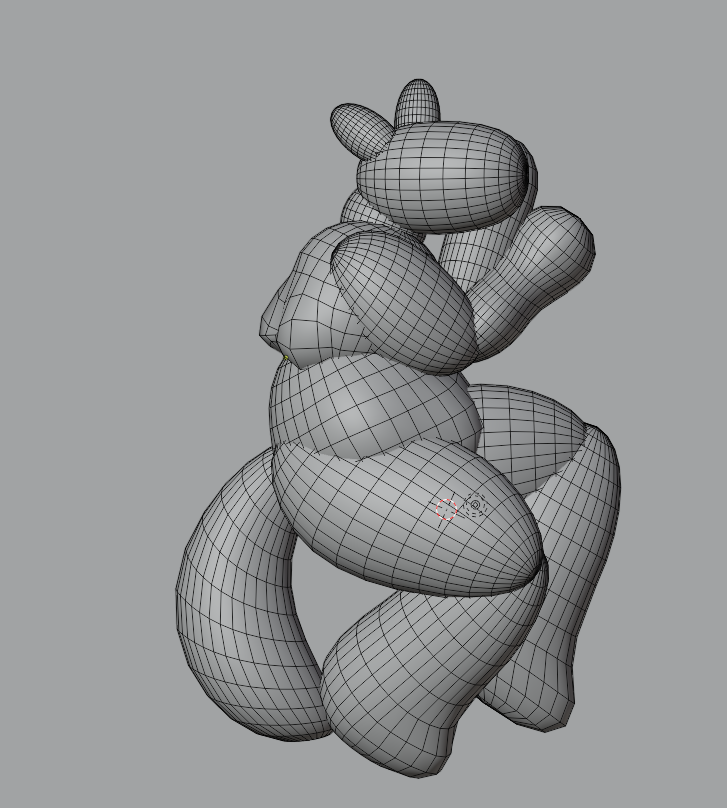
i found out about the 'remesh' option for sculpting fairly recently, which allows the use of multiple unconnected meshes to make a shape like this that can be remeshed into one automagically.
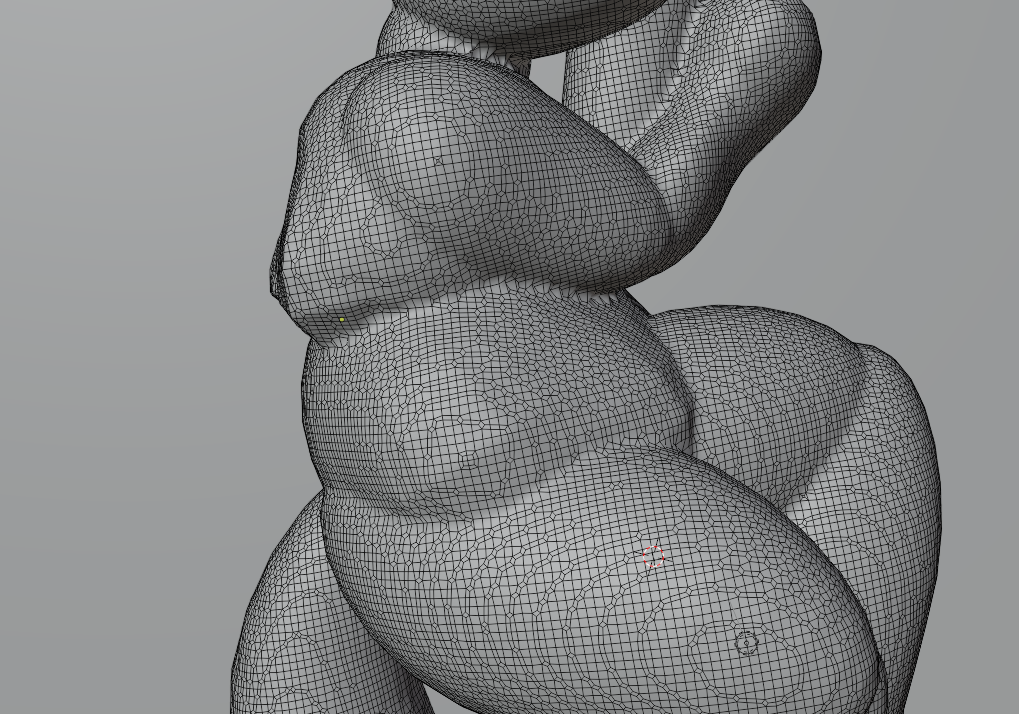
as you can see here, the shapes have been merged together. this is terrible if you're going for a riggable movable model, but since it is just a sculpt, there's no concern about how the mesh looks 'under the hood' as long as the detail is retained. i tend to remesh a few times during the sculpting process to add detail and average out where the vertices go (since you want more detail where there's more vertices).
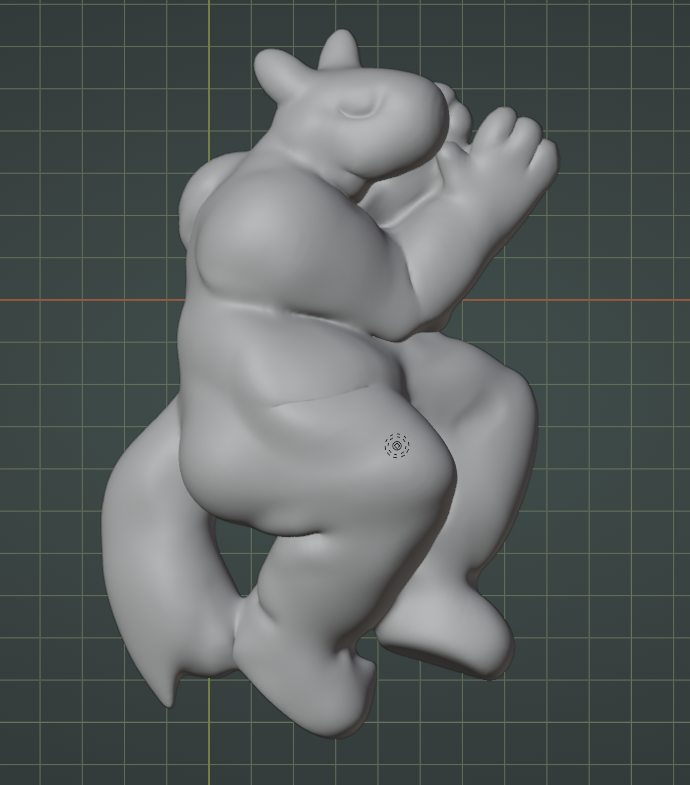
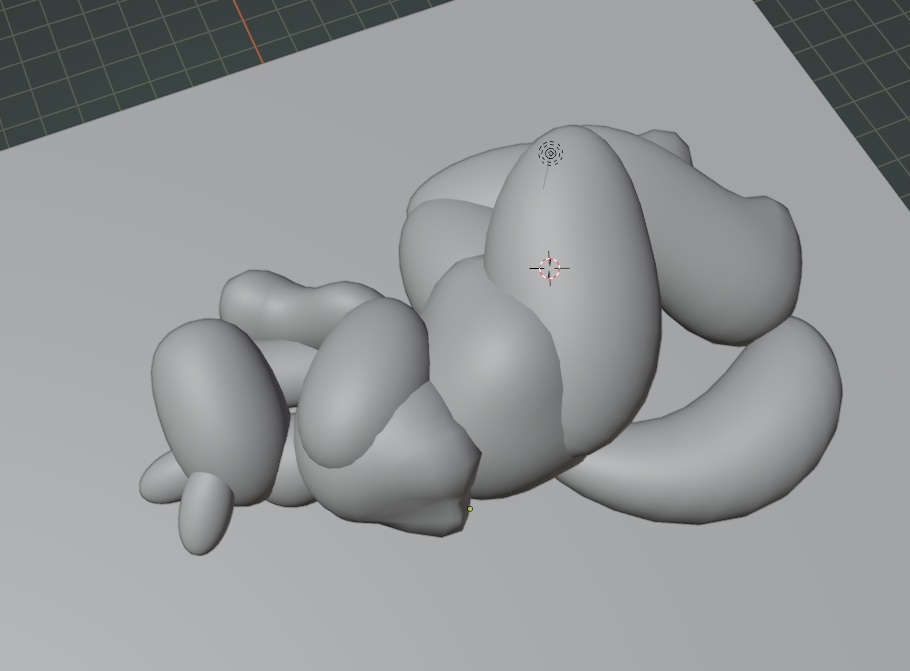
a first pass at the sculpt. i wish i'd moved the upper arm a bit more at this stage. there's still a lot of awkward bits - a lump on one of the feet, the loss of definition around the belly and hips, et cetera - but they will get refined as i continue.

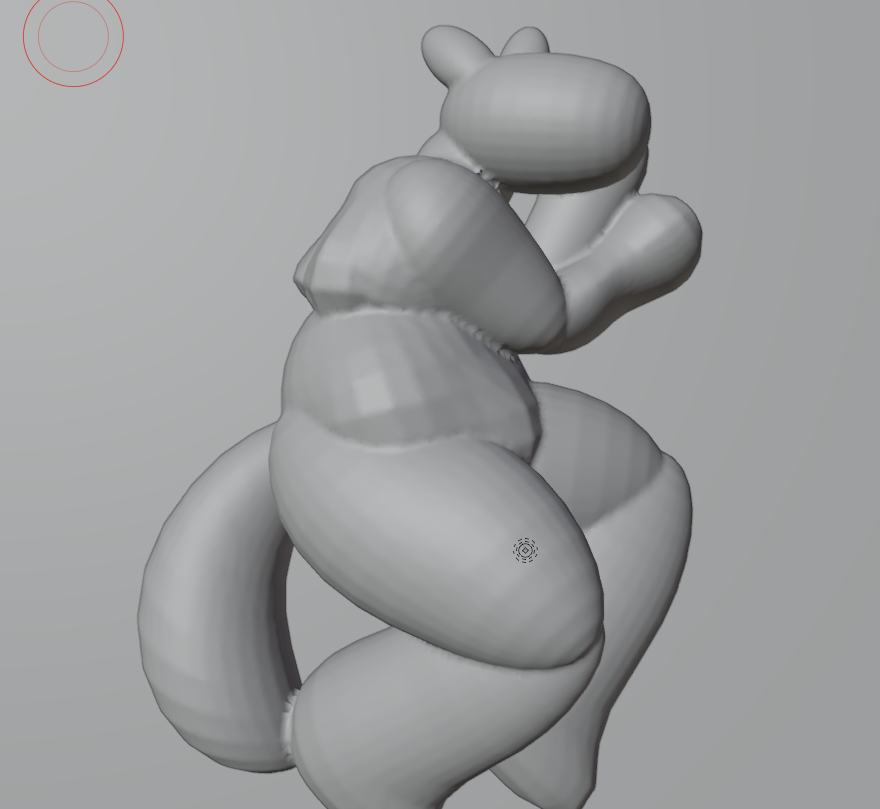
more definition added here. i was at odds with the feet for a time, and i kept looking at the belly and thinking the weight wasn't distributing right against the body. so i spent a bit more time there than i probably needed to. i tried to make the neck thick and give a double chin, but it was a little difficult when the dogthing heads are so uniformly round. i defined some muscle groups by intuition and memory from looking at myself in a mirror.
set-dressing
i didn't take a whole lot of progress pics, but i did take a video of this whole thing, so you can look closer at my madness at a more reasonable speed.
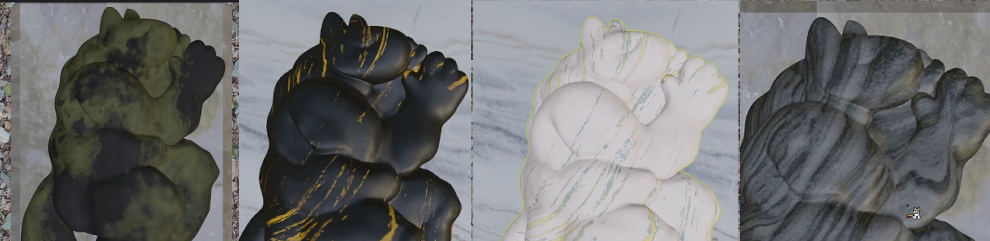
the sculpt itself went through a few texture iterations before i settled on one that felt right. i was really scrabbling around.
my initial pass at the scene render:
the texture was... fine. but there were way too many low-contrast bits here. the leaves blended too much with the floor, and darkening them using a 'mist pass' (ie, a version of the render that darkens things closer to the camera) didn't really look good either. i put the piece down overnight and picked it back up the next afternoon.
i had a brain blast for how i wanted to do the texture and scene in that time.
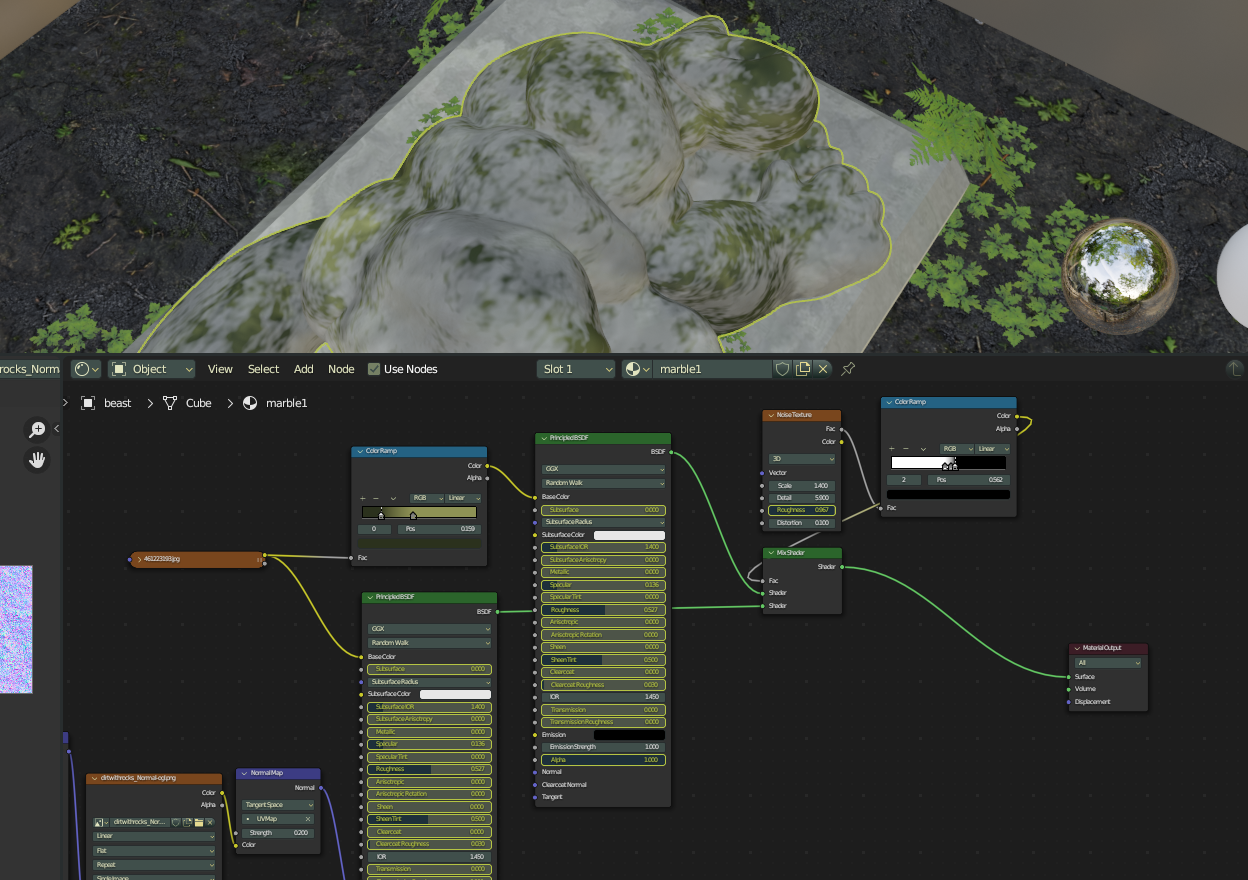
the texture incorporates two shaders - a stone one and a moss one - that borrow the same texture, but for the moss one i used a 'color ramp' node to recolor it like one would use a gradient map in a 2d art program. i then mixed the two together, using a noise node to determine where it mixes and how much.
here's how just the noise texture looks on its own:

and to give you an idea of how much work the 'detail' option is putting in, here it is with the detail number lowered:

the 'detail' option causes it to mottle roughly, not unlike a rock pattern. the dark parts are where the moss shows through most, and the white parts are where the stone shows most.

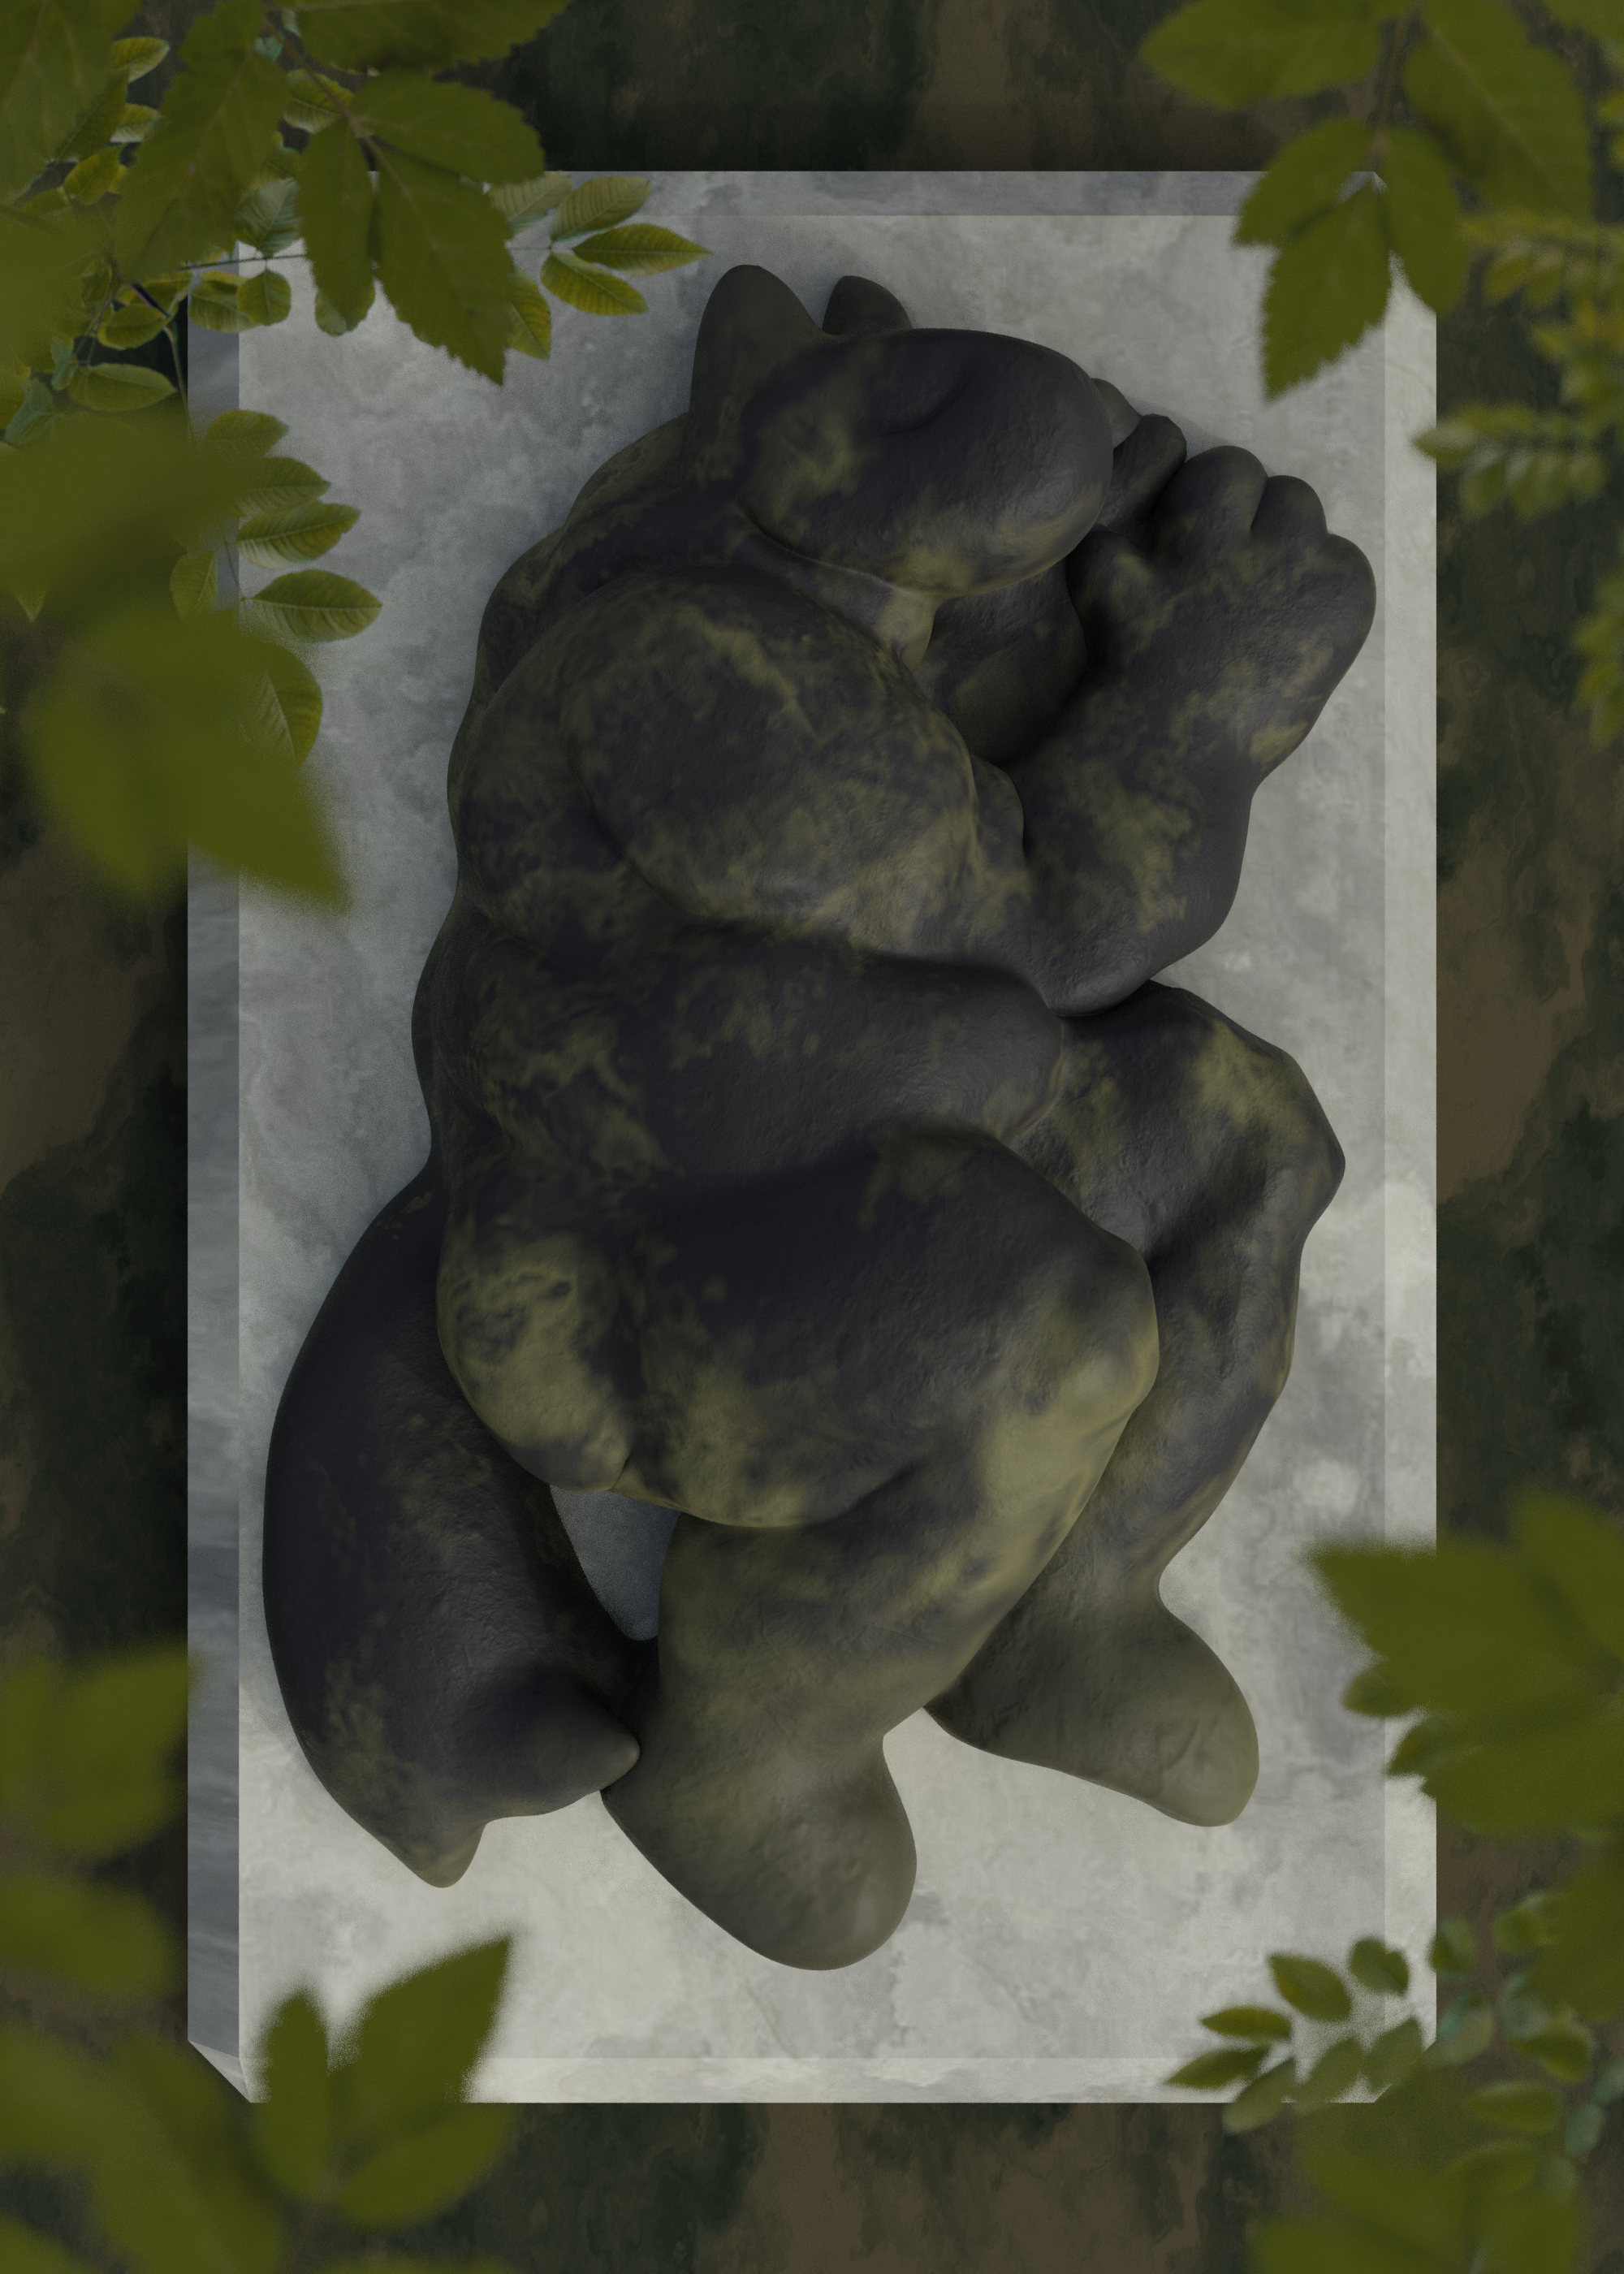
the lighting was another tough choice, but i settled with a nice over-the-head light source with nice blue ambient light.
post-processing
after all of that, i put the image into clip studio and then added a stone-texture frame. i also added a bit of noise using a few different textures from my personal library.

the worst part about this step is that it's easy to go overboard, so i tried to keep the visual edits light and add texture more than messing too much with color or value. (i did end up changing the contrast and brightness just a tad overall, since i often make things that aren't lit enough.)
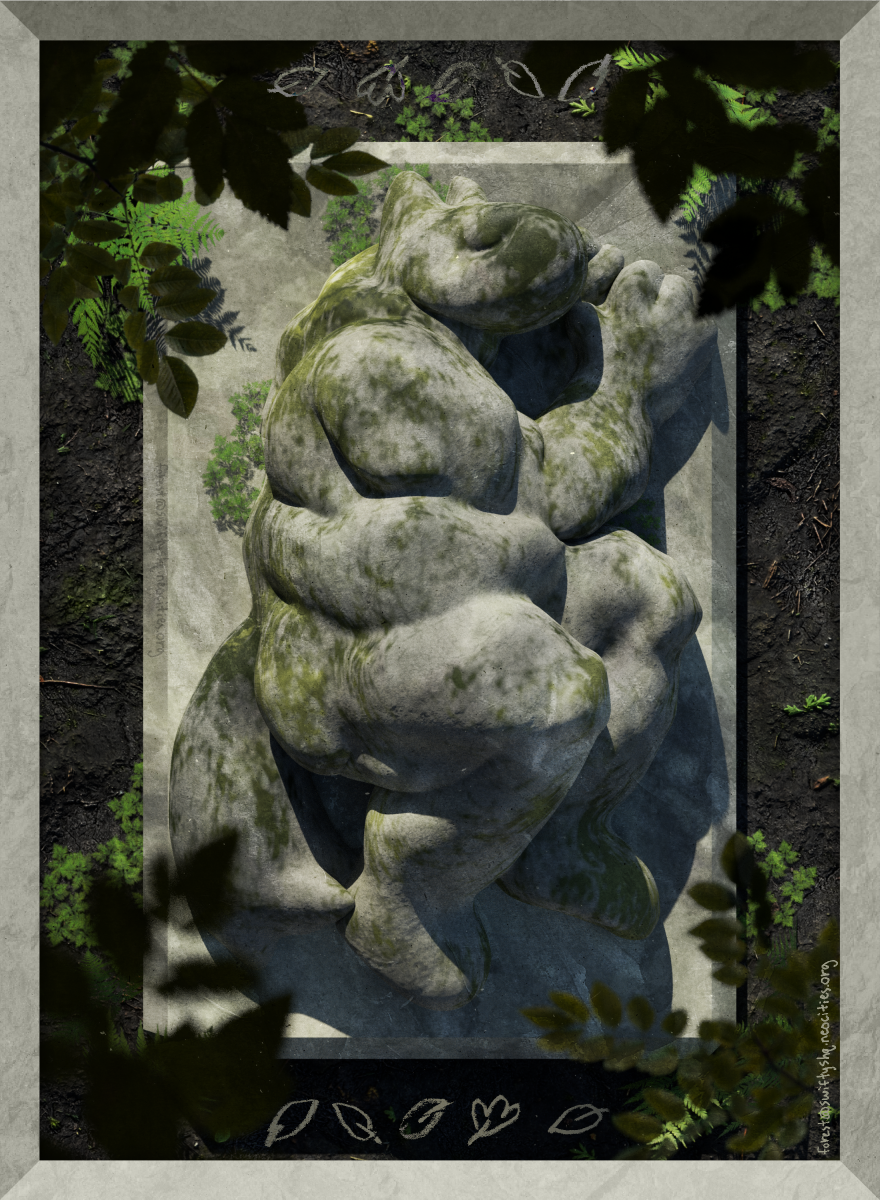
and here's the finished piece!
final thoughts
i am pleased with the final outcome. the lighting i had in mind initially ended up being disruptive to the overall value balance of the thing. i wanted to have light shining down from above through tree leaves (a shadow mask plane), but it obscured a lot of the fine details i'd made in the sculpt, which caused me to go off-course. in the end i prefer this new lighting because it better highlights all the little folds and stuff.
i think that making detailed process logs like this is fun, but tiring. i think i need to do them less frequently - but i rarely know when i will want to record something i'm making. alas! alack! i will do my best not to overwork myself for no reason, i guess.
the speedrender
i can't necessarily call this a speedmodel, speedsculpt, or speedpaint, since it's kind of all at once. i don't know. but you can view it here. enjoy!