 >> swifty's hq v2.2 > main > blog
an avatar of the self (a third plush appears)
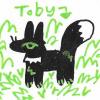
if you've been keeping an eye on the site, you'll know i've been knee-deep in plush-making. i've made two different dogthings, labeled "vermillion" and foxglove. they were my way of practicing before the "big one": a plushie of toby, who you'll recognize as the black fox who frequently appears on this site.
vermillion's lack of articulated paws makes them stand out. foxglove's strange head is peculiar to look at. so, i took some time to create some better plush patterns for toby.
i decided to use plushify to assist in sizing consistency. though, truth be told, i only really used it for the head, which went through a few iterations. but before we get to the head, let's go over some other changes i made.
firstly, i realized that, with hand-sewing, sharp edges are almost impossible. i had to work very hard at making the cheek and neck fluff end in distinct rounded shapes. i found that i was able to re-use the shape from foxglove's tailtip as the cheek and chest fluffs without too much issue.

speaking of the tail, i ended up creating a new shape for it, something more like an S with pointed ends. i decided, since the tail didn't end up like i wanted before, i'd do something a little different with it. i also put the applique tail tip on over the full tail, so i know it's more secure, and it matches up better when it wraps around. overall, i actually made two tails, but the first one was lumpy and not big enough...

i also ended up using a different arm/leg shape than i created for foxglove. instead of a rounded L, i went with a rounded I, so it ended in a curve, but the rest of the leg was straight. i am very grateful i made the legs thicker, which made it easier to stuff rice and poly-fill in them.

of course, i still fumbled the leg attachment. in the future, i want to ladder-stitch them on after i've sewn the body (with chest and tail sewn into the seam at the front and back), instead of trying to fold them through some tiny hole in the body. those legs are way too big for that. so, learn from my mistakes and put the legs on after.
the legs ended up supporting the body really well. so well, in fact, that the plush was able to - and is still able to - stand on its own four legs!

and look how politely it sits!

then there was a period of a week or so where i mostly sat on my hands while i waited for some more fabric to arrive; i needed a nice lime green for the eyes, after all. i bought mochi minky, which is known for its stretchiness. i should have gotten a stiffer fabric instead, but, eh, you live and you learn, just like shadow the hedgehog said.

i worked on a single prototype head before comparing size and realizing it was too small for the body (at least, i thought so!), and didn't have the right shape i wanted.
cutting and applying the eye was.... rough, to say the least.

so, first, i tried applique. i had a strand on top and a circle below. i did not take any pictures because i didn't like it. the edges were jagged and uneven. i like to think the drawing conveys it pretty accurately.
secondly, i decided i'd try making the eyes three-dimensional, but it turns out that mochi minky is good at being very puffy. so, both my second and third attempts were a bust. the final attempt was appended on to my second head attempt.
the second head-shape had a much better form overall. i used a simple ladder stitch to attach them, and then i appliqued the eyes using the needle-turn method to hide the seams. (thank you to all the old ladies who are posting their sewing tutorials on youtube, you are a blessing.)


after stuffing the head and stitching it on, i cut the cheeks and ladder-stitched them a bit lower on the head. i probably could have done that before attaching the head, but hindsight is 20/20...
anyways, after all that, i was finally done!


i will say, i am a lot happier with the overall shape than the first two plushies i made. i think i've gotten better at symmetry and sewing in a line, though it's still difficult to line up the pieces, especially since i don't really feel confident pinning fabric yet. but even with that, i managed to hide most of the thread and it holds shape really well!

the pattern itself is a bit of a mess, but if you want to make your own dogthing, i've gone ahead and put them up for download. the head has seam allowance, the others don't. you've been warned!
head part 1, head part 2,legs and body, tail and etc
again, i did not factor seam allowance into the ones that are blue (everything but the head1/head2 images). this means you'll have to cut out all the pieces and add your own seam allowance. sorry! i am still a novice and didn't fully intend to make them universally usable, LOL. but i hope they're manageable for anyone out there who wants to make their own dogthing!

 |
| listening to: churgney gurgney - silly billy |
| playing: roblox |
| feeling: accomplished |
outside it is:  sunny sunny |